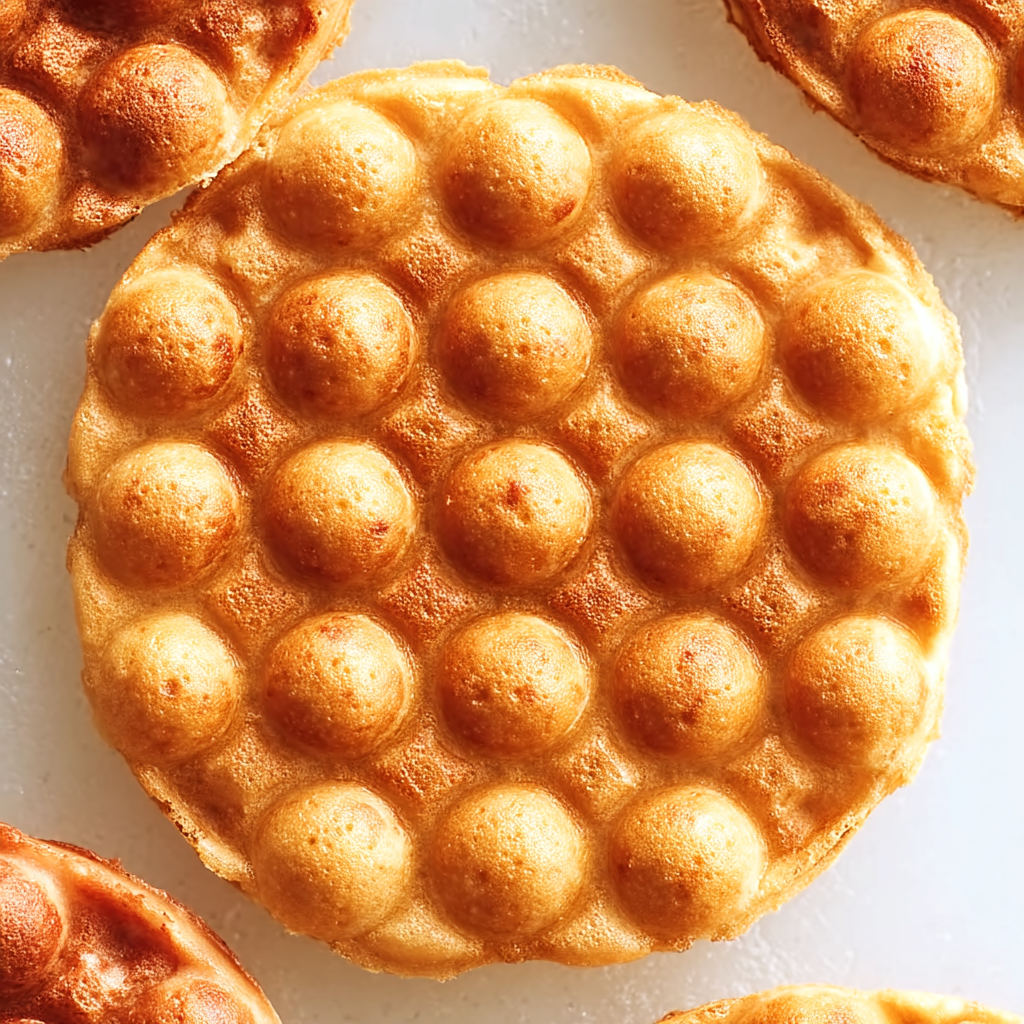
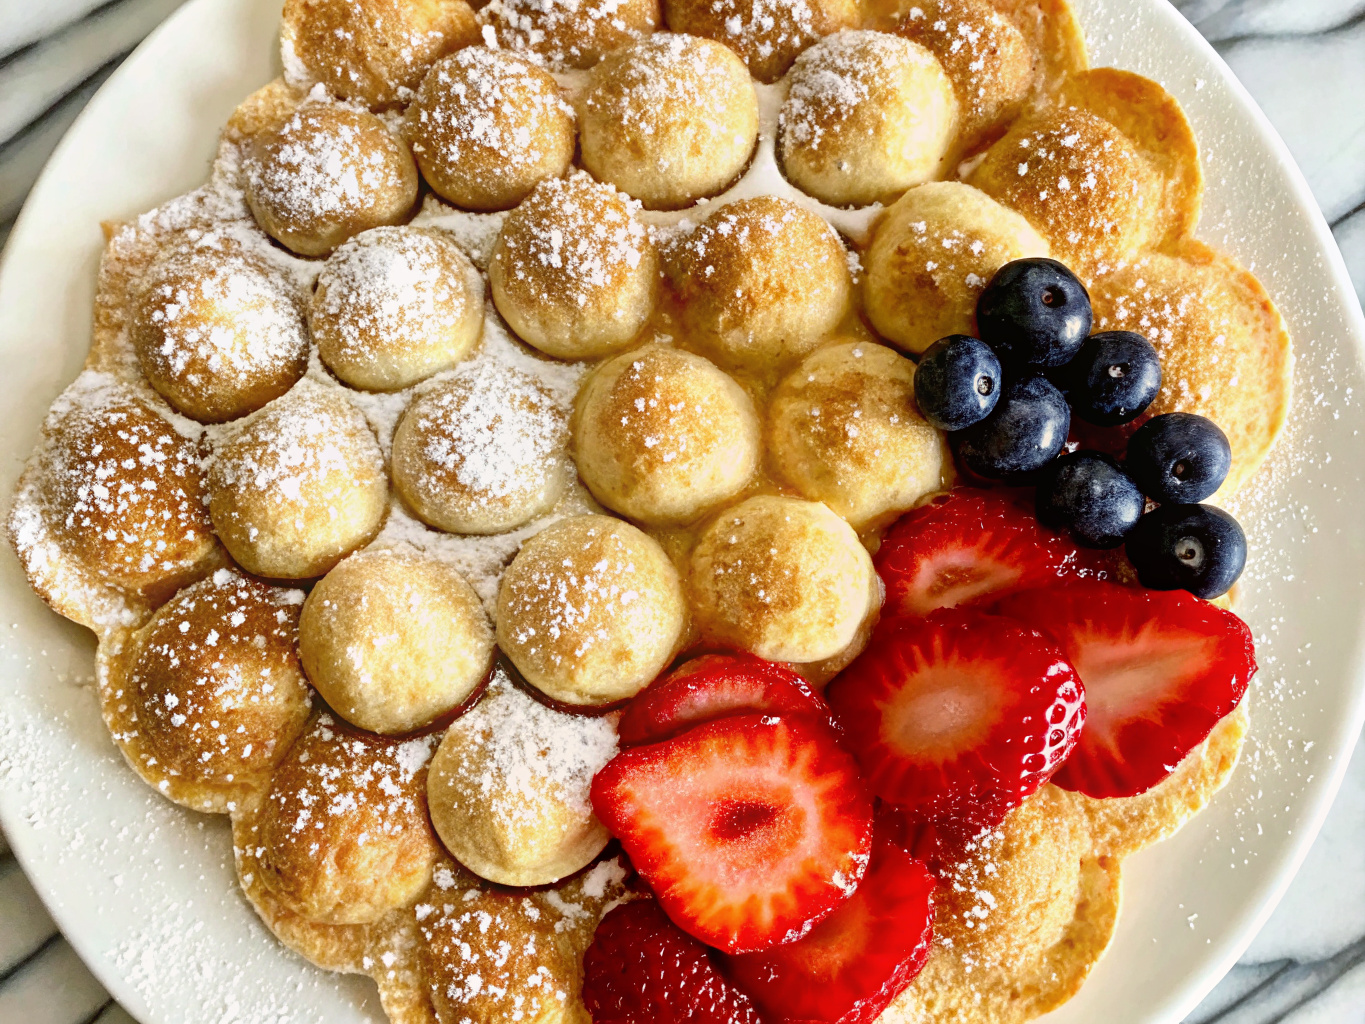
10-Minute Bubble Waffles
Crispy outside and chewy inside, these 10-minute bubble waffles are a fun twist on classic waffles, perfect for topping with ice cream or your favorite mix-ins.

The light, puffed texture of each bubble waffle makes them irresistible, while the quick cook time means you can enjoy them any day of the week.
What You Need for Bubble Waffles
All-purpose flour – Forms the base of the batter, giving structure and softness.
Baking powder – Helps the bubbles puff up for that iconic look.
Cornstarch – Adds lightness and a slight crispiness to the edges.
Salt – Enhances all the sweet and buttery notes.
Egg – Binds the ingredients and adds richness.
Sugar – Sweetens the batter and helps achieve golden coloring.
Milk + Water – Loosens the batter just enough for easy pouring.
Vanilla extract – Infuses warm, aromatic flavor.
Unsalted butter – Adds richness and helps the waffles crisp as they cool.
Quick Steps to Perfect Bubble Waffles
Whisk together dry ingredients. Add wet ingredients and mix until smooth. Blend in melted butter. Preheat your bubble waffle pan, oil it, and pour in the batter. Flip and cook until golden. Cool briefly for crispiness, then top and serve.
Tips to Elevate Your Bubble Waffles
For chocolate lovers, mix in cocoa powder to the batter. Add crushed cookies, sprinkles, or cereal for a personalized treat. Let them cool before shaping—this ensures they hold crisp, creative forms like cones or bowls.
Best Ways to Store Bubble Waffles
Bubble waffles are best eaten fresh, but you can store leftovers in an airtight container at room temperature for up to one day. Reheat briefly in a toaster or oven to bring back their crispness.
Frequently Asked Questions
Can I make these waffles without a bubble waffle pan?
Not quite—the puff texture depends on the pan’s unique shape. A regular waffle maker won’t create the same bubbles.
Can I freeze bubble waffles?
Yes! Freeze them in a single layer, then reheat in the oven at 350°F for 5–7 minutes until crisp.
Can I make the batter ahead of time?
Yes, store it in the fridge up to 24 hours. Stir before using.
Are they gluten-free?
You can use a 1:1 gluten-free flour blend. The texture may be slightly different but still delicious.
Make It a Dessert Station
Serve bubble waffles as a base for a build-your-own sundae bar. Let guests choose from ice cream, fruit, chocolate syrup, or whipped cream to top their own crispy creation.
10-Minute Bubble Waffles
Ingredients
- ¼ cup 50 mL water
- 1 tsp 5 mL cornstarch
- 1 egg
- ¼ cup 50 mL milk
- 1 tsp 5 mL vanilla extract
- 2 tbsp 30 mL unsalted butter, melted
- ⅛ tsp 0.5 mL salt
- ¾ cup 175 mL all-purpose flour
- 1 tsp 5 mL baking powder
- ½ cup 125 mL sugar
Instructions
- In a mixing bowl, thoroughly whisk together the flour, cornstarch, salt, and baking powder. Crack in the egg, then stir in the sugar, milk, water, and vanilla extract. Blend until the batter is smooth and cohesive. Finally, whisk in the melted butter to complete the mixture.
- Coat both sides of the Waffle Puff Pan lightly with oil. Preheat it over medium heat for about 3 minutes. Pour approximately ¾ cup of batter into the pan, ensuring all the bubble molds are filled. Close the pan, flip it, and allow to cook for 2 to 4 minutes. Invert it again and continue cooking for another 2 to 4 minutes, or until the waffle is golden brown. Remove using a fork and let it sit for one minute to achieve a crisp texture. Garnish with toppings as desired.