Panko Crusted Chicken Recipe
When you’re craving a dinner that’s both easy and irresistibly satisfying, these Crispy Panko Crusted Chicken Breasts deliver crunchy, golden perfection with every bite. Juicy on the inside and beautifully crisp on the outside, they’re sure to become a weeknight staple.
Made with a few pantry staples and a quick frying technique, Crispy Panko Crusted Chicken Breasts are ready in under 30 minutes, making them the ideal choice for busy nights when you still want something special.
Star Ingredients for Crispy Panko Crusted Chicken Breasts
- Boneless, skinless chicken breasts – The star of the dish, providing a juicy, hearty base that soaks up all the flavorful coatings.
- All-purpose flour – Creates a dry surface on the chicken, ensuring the egg and breadcrumbs cling perfectly.
- Large egg – Acts as a sticky, protein-rich bridge between the flour and breadcrumb layers.
- Panko breadcrumbs – Deliver that signature crunch, staying light and crispy after pan-frying.
- Grated parmesan cheese – Adds a salty, nutty depth that enhances the crispy coating beautifully.
- Cajun seasoning or Italian seasoning – Infuses the crust with a punch of bold flavor.
- Paprika – Gives the crust a subtle smoky sweetness and vibrant golden color.
- Extra virgin olive oil and butter – Fry the chicken to golden, flavorful perfection, balancing richness and crispness.
Quick & Easy: How to Make Crispy Panko Crusted Chicken Breasts
First, fillet and pound your chicken breasts to an even thickness for even cooking. Lightly season them with salt and pepper.
Set up three breading stations: one with seasoned flour, one with a lightly beaten egg wash, and one with a panko-parmesan-seasoning mixture. Coat the chicken thoroughly in each layer—flour first, then egg, then panko.
Heat olive oil and butter in a skillet over medium heat. Once hot, fry the chicken breasts for 3–4 minutes per side until golden brown and cooked through. Keep the heat controlled to prevent burning while ensuring a crispy crust.
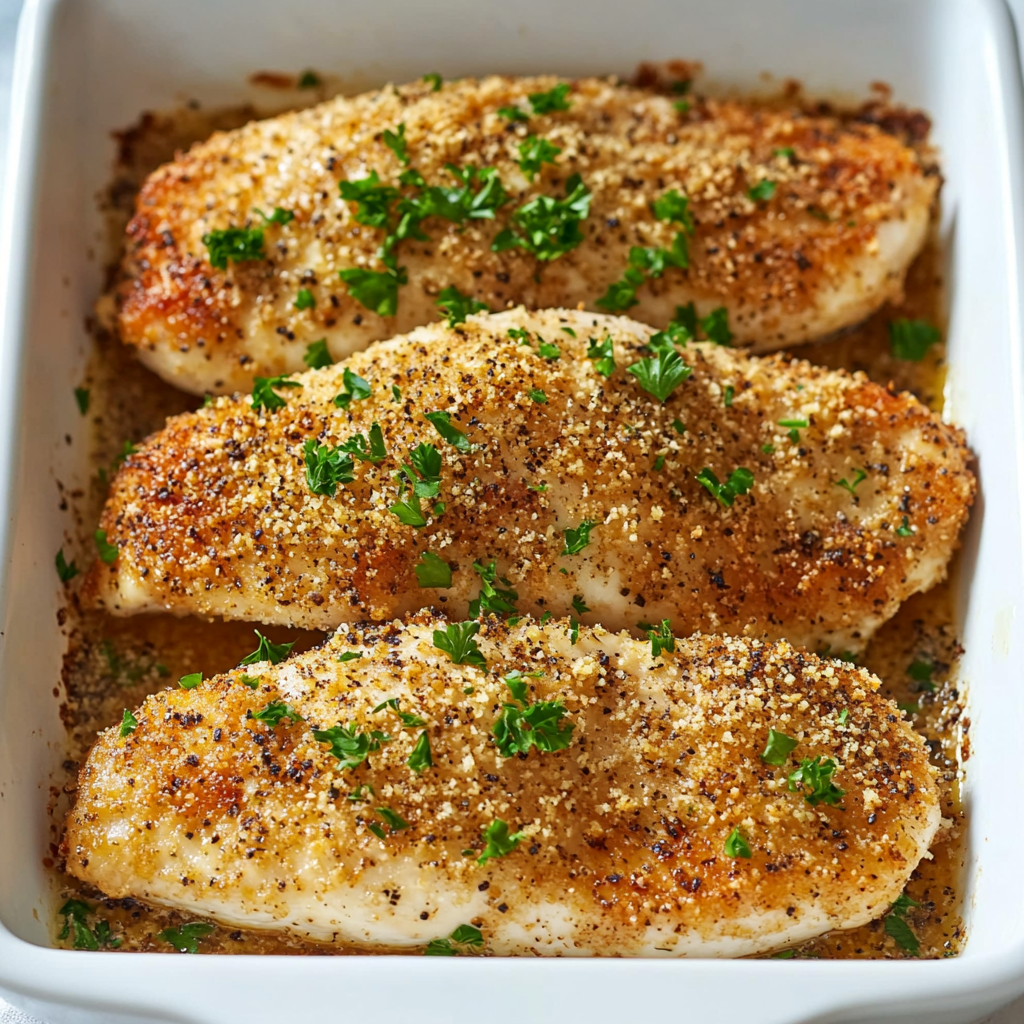
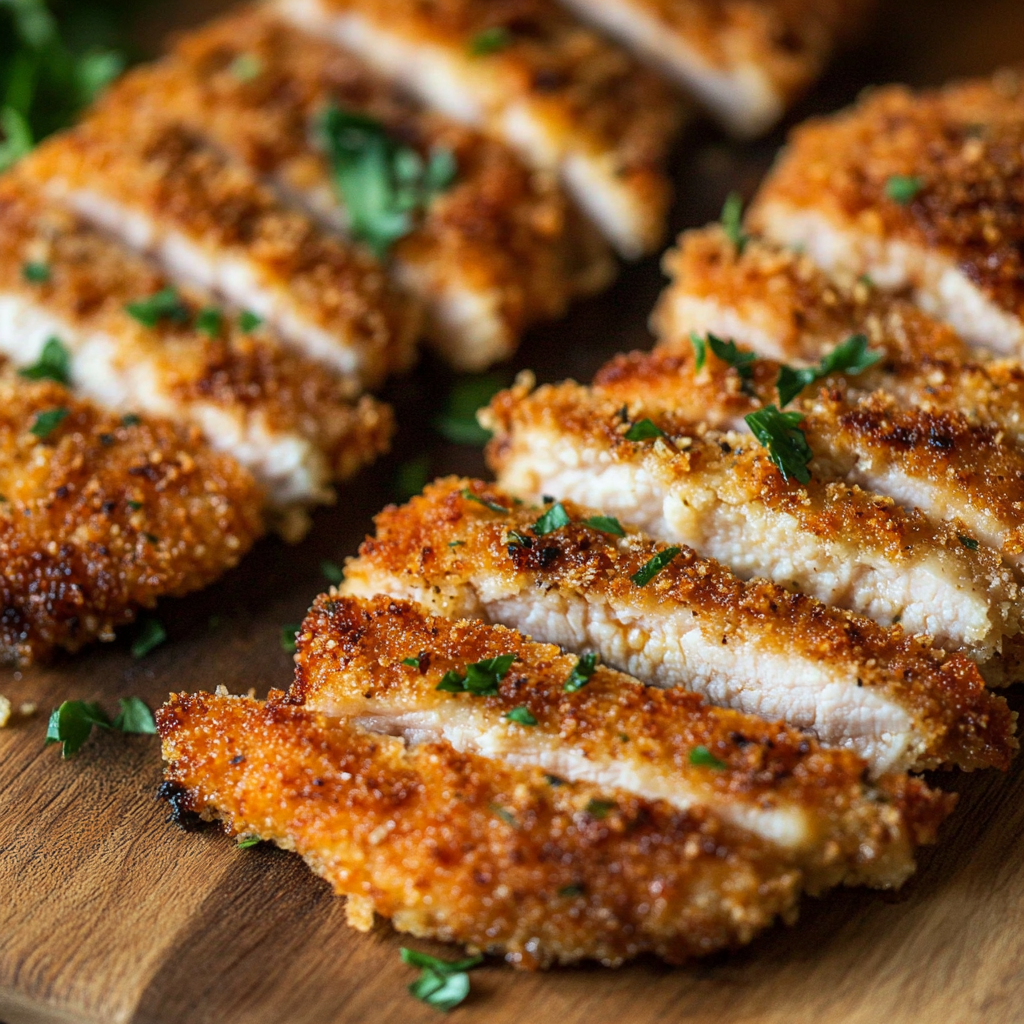
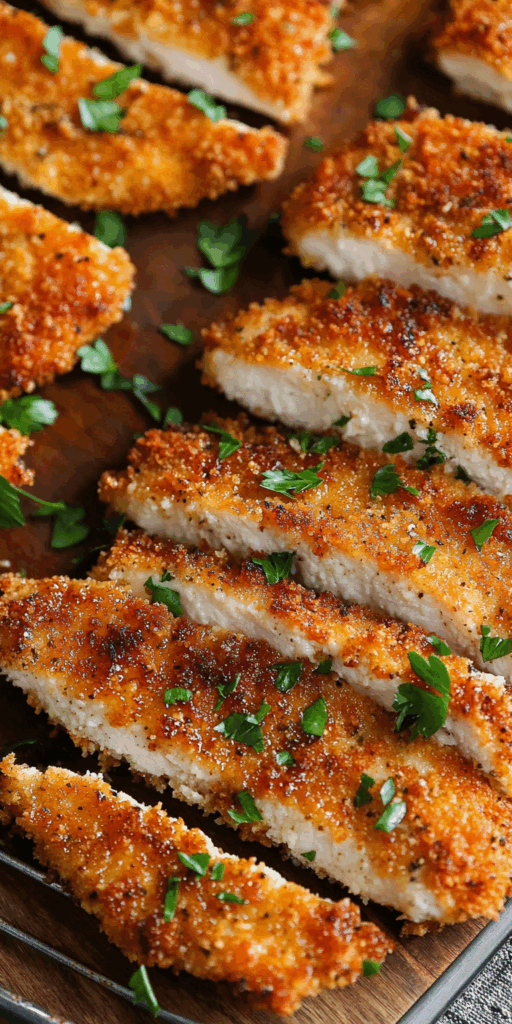
Transfer the chicken to a wire rack after cooking to maintain its crispiness. Serve hot and enjoy the perfect crunch in every bite!
Pro Tips and Tasty Variations for Crispy Panko Crusted Chicken Breasts
For the ultimate crispy finish, make sure the chicken is fully coated in the egg wash before pressing into the breadcrumbs—this ensures the crust sticks beautifully. Cook the chicken over medium to medium-low heat; high heat can cause the panko to burn before the chicken cooks through. If your skillet runs hot, lower the temperature halfway through cooking for even browning.
To switch things up, try adding a sprinkle of lemon zest to the breadcrumb mixture for a citrusy lift or swap Cajun seasoning for smoked paprika and cumin for a smoky, earthy flavor profile. You can also create a spicy version by mixing a pinch of cayenne pepper into the flour.
Storing and Reheating Crispy Panko Crusted Chicken Breasts
To keep your Crispy Panko Crusted Chicken Breasts tasting fresh, store leftovers in an airtight container in the refrigerator for up to three days. To reheat, place the chicken in a 350°F oven for about 10–15 minutes to restore its crunch without drying it out. Avoid microwaving if possible, as it can soften the crispy coating.
For longer storage, freeze cooked chicken breasts individually wrapped and placed in a freezer-safe bag. Reheat directly from frozen in the oven for best results, adding a few extra minutes to the baking time.
Crispy Panko Crusted Chicken Breasts
Ingredients
- 2 Tablespoons extra virgin olive oil
- ½ teaspoon onion powder
- ½ teaspoon garlic powder
- ½ cup all-purpose flour
- 1 teaspoon Cajun seasoning or Italian seasoning
- 1 cup plain panko breadcrumbs
- 1 teaspoon paprika
- ½ cup grated parmesan cheese
- 1 large egg
- 2 boneless skinless chicken breasts
- 1 Tablespoon butter
- 1 ½ teaspoons fine sea salt divided
- 1 teaspoon black pepper divided
Instructions
- With a sharp knife, slice each chicken breast horizontally into two thinner cutlets. Place the chicken between layers of plastic wrap and gently pound the thicker sections using a meat tenderizer or rolling pin until the pieces are uniformly thick. Season both sides of the chicken with ½ teaspoon salt and ½ teaspoon black pepper.
- Prepare three shallow dishes for the breading process. In the first dish, combine the flour with ½ teaspoon each of salt, black pepper, onion powder, and garlic powder, mixing thoroughly with a fork.
- In the second dish, crack the egg, add 1 teaspoon of water, and beat lightly until well blended.
- In the third dish, stir together the panko breadcrumbs, parmesan cheese, ½ teaspoon salt, Cajun seasoning or Italian seasoning, and paprika until evenly mixed.
- Using tongs or your hands, dredge each chicken cutlet in the flour mixture, coating all sides, and shake off the excess. Next, dip into the egg mixture, allowing any extra to drip off, and finally press the chicken firmly into the panko breadcrumb mixture, ensuring an even coating on all sides.
- Preheat a large skillet over medium heat, then add the olive oil and butter. Once hot, carefully lay the chicken cutlets in the skillet. Fry for about 3–4 minutes per side, adjusting the heat to medium-low if necessary to avoid burning the breadcrumbs while ensuring the chicken cooks through.
- When the chicken is a rich golden brown and reaches an internal temperature of 165°F, remove it from the skillet and place it on a wire rack to maintain its crispiness. Serve promptly.
Notes
Monitor the skillet’s heat closely, as panko crumbs can burn easily. Reduce the heat to medium-low if necessary during cooking to achieve a perfectly crispy coating without burning.