Fried Chicken Recipe
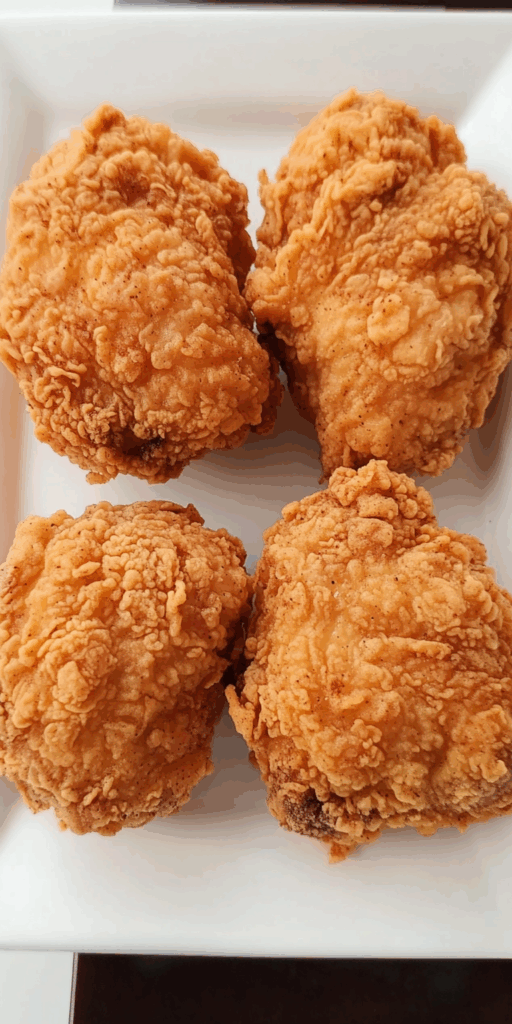
Crispy, golden, and irresistible, Easy Fried Chicken is your go-to recipe for a crowd-pleasing dinner that never fails to impress. With juicy meat and a crunchy crust, every bite is comfort perfected.

This recipe skips complicated steps by using a two-stage dredging method and a milk brine that ensures both flavor and tenderness. Simple ingredients, maximum flavor, unforgettable texture.
What You’ll Need for the Best Easy Fried Chicken
- Chicken drumsticks or thighs – Bone-in, skin-on chicken brings bold flavor and juicy texture to the dish.
- Whole milk – Acts as a tenderizing brine, helping break down the meat for extra-juicy bites.
- Garlic cloves, bay leaves, and peppercorns – Infuse the brine with deep aromatic notes that subtly enhance the meat.
- Flour and cornstarch – The perfect combo for a crisp, light crust that shatters with every bite.
- Kosher salt, white and black pepper – These seasoning staples boost the natural flavor of the chicken and add layered spice.
- Garlic and onion powder – Essential for deep umami flavor in every crunchy bite.
- Cayenne pepper – A hint of heat that cuts through the richness beautifully.
- Baking powder – Helps create that signature bubbly, craggy coating.
How to Make Easy Fried Chicken
Start by piercing the chicken and soaking it in a seasoned milk brine for a few hours to boost flavor and tenderness. While it brines, mix up your dry seasoning blend—this will serve as both your dredge and base for the wet batter.
Make a quick wet batter using water and some of the seasoning mix, then coat each piece of brined chicken first in the wet batter and then in the dry mix. Be sure to press the dry mix in well, creating those delightful crispy edges.
Heat neutral oil in a heavy-bottomed pot or cast-iron pan. Once hot (350°F), fry the chicken until the crust is deeply golden and the internal temp reaches 165°F. Let rest briefly before serving.
Tips & Tricks for the Crispiest Chicken Ever
A milk brine does wonders—don’t skip it if you have time. The lactic acid helps break down muscle fibers, creating tender, flavorful meat. Piercing the chicken beforehand lets the brine work even deeper.
The magic of a crispy crust lies in the flour-cornstarch-baking powder trio. Cornstarch minimizes gluten formation, keeping the crust light, while baking powder forms air bubbles that puff and crisp the coating as it fries.
For those signature crispy bits, rub a bit of the leftover brine into your dry seasoning to form clumps before dredging. These clumps stick to the batter and create a textured, extra-crunchy surface.
Fry in batches and never overcrowd the pot. Too much chicken lowers the oil temperature, leading to soggy skin. Use a thermometer to monitor the oil and keep it consistently between 325°F and 350°F.
Storing and Reheating Fried Chicken Like a Pro
To store leftovers, let the fried chicken cool completely before placing it in an airtight container lined with paper towels to absorb moisture. Keep it in the fridge for up to 3 days.
For crisp reheating, skip the microwave—use an oven or air fryer instead. Heat at 375°F for about 10–15 minutes until the chicken is hot and the crust is revived. You can also freeze fried chicken: wrap individual pieces in foil and freeze up to 2 months. Reheat directly from frozen in a 400°F oven for best results.

Easy Fried Chicken
Ingredients
- 2 tbsp black peppercorns
- 4 cups whole milk or substitute with water
- 1 cup cold water
- 1 tbsp black pepper
- 1 tbsp onion powder
- 1/4 cup salt
- 1 tbsp garlic powder
- 3 bay leaves
- 1 cup of the seasoning mix for the wet batter
- 3 lb drumsticks or thighs
- 8 cloves garlic
- 1 tbsp kosher salt
- 2 cups flour or gluten-free alternative
- 1 tbsp baking powder
- 1/2 tbsp white pepper
- 2 cups cornstarch
- 1/2 tbsp cayenne pepper
- Neutral oil for frying
Instructions
- Pierce each piece of chicken gently with a knife. Submerge in a brine made of whole milk (or water), salt, garlic cloves, black peppercorns, and bay leaves. Let soak for 2 to 3 hours, or overnight for deeper flavor and tenderness.
- Mix together the flour, cornstarch, kosher salt, white pepper, black pepper, garlic powder, onion powder, cayenne pepper, and baking powder in a large bowl until evenly combined.
- Take 1 cup of the seasoning mixture and stir it into a separate bowl with cold water until a smooth wet batter forms.
- Remove the chicken from the brine. Add a few spoonfuls of the brine to the remaining dry seasoning mix, using your hands to mix and form small lumps for enhanced texture.
- Dip each piece of chicken into the wet batter, allowing the excess to drip off, then press it into the dry seasoning mixture until thoroughly coated. Set the coated pieces aside on a baking tray.
- Heat neutral oil in a large cast iron skillet, Dutch oven, or heavy-bottomed pan to 350°F. Fry the chicken for 8 to 12 minutes, depending on size, until the internal temperature reaches 165°F.

